Thursday, September 26, 2013

Retin.us - Naive Bayes Machine Learning Basics


Retin.us - My Personal RSS Reader (source)
It's been a while since my last update on Retinus (original post). Not much has changed since then, the codebase has been quite robust and hasn't needed any maintenance. However I did promise in the previous post that I would go over how I built it, so I figured it would be a good time to go over the feature I added recently instead, which is a predicted article interest notification system using Naive Bayes classification.

There is a close up of what it looks like ----->
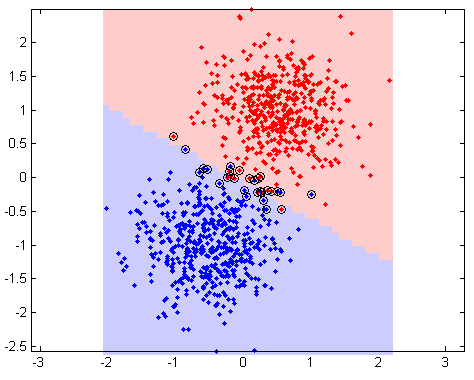
Green means that I will probably be interested in this article,
and Red means that I will probably not be interested in the article. Simple.

I actually had a similar system in the form of a chrome extension for Google Reader (back when that was still a thing). The way it works it that it analyses patterns in my history, specifically it looks at the title, summary, and target links of articles which I have clicked on in the past (indicating interest), and it compares that to new articles for similarity. If there seems to be a correlation with the current article and what I clicked in the past, the classifier (Naive Bayes) returns a positive correlation, and I mark the article as interesting.

Now, before I go on, I will preface with the fact that this feature is currently turned on for everyone, however it classifies only based on my history. The reason for this is
  1. I am the only heavy user of my reader, which means I am the only one with enough click history to make accurate predictions for. And
  2. Computing and storing predictions is expensive (storage, memory, and computation), and I simply don't have the resources to maintain that kind of service for everyone (pro version?).
Anyways, lets begin with an introduction to Naive Bayes classification and go over basically how it works. I recommend you read other sources as well (and watch this video), but I will try to explain it from a high-level programmer perspective.

Naive Bayes works by assuming that all 'features' are independent (that's the Naive part). A 'feature' is an input. For example, lets say I have a cat dog with brown fur and floppy ears. Well then I may have two features I can use to compare him to other dogs - fur color (1) and ear floppiness (2). I can measure how floppy his ears are (and get a float/int) or I can measure if his ears are floppy (and get a boolean) (same for fur). However, we have to assume that these are independent. The fact that the dog is brown does not affect if his ears will be floppy (remember, Naive). It may be that in fact the features really are related (brown dogs have floppy ears) however, we ignore this fact in order to make computation reasonable (it's a CPU intensive computation).

Now, lets see how we can extract 'features' from text. Lets take the following string:
The dog sat down and the dog was happy.
 Alright, we can now break down the string into individual words (each word is a feature) (this is where you tokenize words, and can do thing like remove punctuation and add word combinations).
{
  'the': 2,
  'dog': 2,
  'sat': 1,
  'down': 1,
  'and': 1,
  'was': 1,
  'happy': 1
}

Now, lets add another sentence to compare it to, and also label out two sentences differently.
// dog sentences
'dog': {
  'the': 2, 'dog':2, 'sat':1, 'down':1, 'and':1, 'was':1, 'happy':1
},
// cat sentences: the cats like scratching 
'cat': {
  'the': 1, 'cats': 1, 'like': 1, 'scratching': 1
}

Ok, now we can try to classify a new sentence: 'the animal lay down at my feet'
{
  'the':1,'animal':1,'lay':1,'down':1,'at':1,'my':1,'feet':1
}
// dog-ness score
2 + 1 + 1 = 4 ('the'*2, 'lay', 'down')
// cat ness score
1 = 1 ('the'*1)

And we can then see that the sentence is more 'dog-like' than 'cat-like' because it's score is higher when comparing to the dog sentence history. Now obviously we haven't taken into account total sentences per class, or normalization of variables, or other things which would give us better results, but you get the idea. Here is a proper implementation of what I just described in ~100 lines of javascript. That bit of code comes straight out of the library which I used to do the classifications.

While I think it's important to understand generally whats going on in an algorithm like this, I don't find it so interesting to re-write what others have already done (as it can get quite complicated, especially with how you group words together, and stemming). So I opted to use the 'natural' language processing library, which has a built in Naive Bayes classifier.

In addition the the Bayes classifier, it also has a Logistic Regression classifier which I looked at, and I also found this SVM library svmjs which I tried as well (it didn't really work out). I'll explain both real quick.

The Logistic Regression classifier was horribly slow compared to the Bayes classifier, because logistic regression does not assume that the 'features' (words) are independent of each other. The results were also not that much better than the Naive Bayes, so I decided not to use it. The way this type of classifier works (~150 lines source) is, well, I'm not really sure. I think about it like a super multi-dimensional graph, where each word lives in N dimensional space and input documents create lines in this space, and then to classify we create a line out of our input document and compare it to other lines in the space (I hope that made sense).


In addition to the logistic regression, I tried to use a Support vector machine (svm) to try to combine the results of many classifiers into a new, more accurate classifier. Besides the fact that the SVM library I chose to use didn't even work correctly (probably my fault), the SVM led to results that were sub-optimal for my particular problem (more on this in a sec). The way the SVM works, is that it takes an input matrix (array) of features and then tries to fit new matrices into either one of two groups (binary classification) by comparing it to  matrices in its history.

Like so:
// train
[1,1,1,0,0,0]  1
[1,0,1,0,0,0]  1
[0,0,0,1,1,1] -1
[0,0,1,1,0,1] -1
        
// test
[0,1,1,0,0,0] == 1
[0,0,0,0,1,1] == -1

Now, as I mentioned before, I have 3 separate feature sets for rss feed items: title, summary, and link
My final solution was this:
var classifier1 = new natural.BayesClassifier() // summary
var classifier2 = new natural.BayesClassifier() // title
var classifier3 = new natural.BayesClassifier() // links

// in a loop
 // train history based on hostname
  var hostname = url.parse(item.link).hostname.replace(/\./g,'_')
  classifier3.addDocument([hostname], isInteresting)
  
  // bayes text classifiers
  classifier1.addDocument(item.summary.toLowerCase(), isInteresting)
  classifier2.addDocument(item.title.toLowerCase(), isInteresting)


// test
var tag1 = classifier1.classify(docs[i].feedItem.summary.toLowerCase())
var tag2 = classifier2.classify(docs[i].feedItem.title.toLowerCase())
var tag3 = classifier3.classify(hostname)

result = (tag1 === 'true' && tag3 === 'true' || tag2 === 'true'  ? true : false)

Which gave me ~60% accuracy, with ~20% false negatives (I had ~4000 documents in my training set, and I separated 200 extra documents for testing, meaning that the classifiers were not trained on the 200 selected documents meant to check their accuracy). I care a lot about false negatives because a false negative means that an article was marked as uninteresting, when in fact I would have actually been interested in reading it. When I applied the SVM or combination Bayes classifier:
var classifierSum = new natural.BayesClassifier() // total

// in a loop
 var tag1 = classifier1.classify(item.summary.toLowerCase())
 var tag2 = classifier2.classify(item.title.toLowerCase())
 var tag3 = classifier3.classify(hostname)

 classifierSum.addDocument([tag1,tag2,tag3], isInteresting)
  
// test
var tag1 = classifier1.classify(item.summary.toLowerCase())
var tag2 = classifier2.classify(item.title.toLowerCase())
var tag3 = classifier3.classify(hostname)

result = classifierSum.classify([tag1, tag2, tag3])

I ended up with 90% accuracy, but also 100% false negatives (it marked everything as uninteresting). 90% is technically better than 60%, but having so many false negatives was not optimal for my problem.

That about covers the machine learning aspect of Retin.us so far, over the next few weeks I will be assessing its accuracy, and may eventually use it to pre-filter out uninteresting articles so as to save me time. As for the rest of the software stack, basically it uses Sails.js (home page), MongoDB, and Backbone (the Sails version is quite outdated, but the backbone code is decent to learn from).

Sunday, September 8, 2013

戦士 - Senshi (an MMO Battle-Royale inspired game)

senshi.zolmeister.com
A real-time MMO Battle-Royale inspired game, with permadeath (names can never be reused).
Source: github.com/Zolmeister/senshi - Sprite Attribution: Ghosa
Audio editor: senshi.zolmeister.com/audio.html

This game is my submission to js13kgames, a contest similar to js1k, but instead you get 13k (for the client, and also the server), and you get to zip it (!). After competing in js1k, I was amazed at how much I could get out of 13k, especially due to the zipping. In fact, the source in the zip files is uncompressed, because using a minifier actually increased the file size. In the end: client - 11.3KB, server - 4.1KB.

Making the game was fairly straight forward, except perhaps the audio, which I will explain in detail, as well as the real-time socket.io code.

The game engine is completely server-side, with the client solely used for rending and sending keystrokes. This is necessary to prevent cheating, as the client can never be trusted. The ideal solution (which I didn't get around to implementing) is to have the client and the server both have physics engines running simultaneously, with updates from the server forcing the client to sync up. Here is a great video from Google.IO which goes deep into the mechanics of a real-time MMO game:
Google I/O 2012 - GRITS: PvP Gaming with HTML5
With the 13KB limitation, you have a lot of room to work with in terms of pure JS, however the art assets (Sprites and Audio) are highly constrained. For this reason, I decided to go with pixel art, and custom audio format. I am not the most artistically inclined person, so I opted to use a sprite someone else made on opengameart.org and then modified it to include each weapon (using GIMP). Here is what my sprite sheet/atlas looked like:


As you can see, each frame of animation has its own image, as well as each weapon. On the right, I merged the item/terrain atlas in the same PNG to save space. The player is 22x20px, and the items are 14x14px (some items were unused).

One of the biggest features I wanted to add was diagonal walking, but I just could not muster the artistic talent (not for lack of trying) to draw the character (lets call him Zed) facing new directions. So I cheated by skewing the image using ctx.setTransform() :
function drawPlayer(x, y, name, health, dir, frame, weapon, kills) {

  // 22 x 20, with +10 x-offset
  var tanAngle = Math.tan(Math.PI / 4)
  var rowDir = [1, 0, 0, 0, 1, 2, 2, 2]
  var row = rowDir[dir]
  var col = frame == 3 ? 1 : frame
  col += (weapon + 1) * 7
  x += 10

  ctx.save()
  if (dir == 0 || dir == 1 || dir == 7) {
    // facing left
    ctx.translate(44, 0)
    ctx.scale(-1, 1)
    x = 22 - x
  }

  //draw character
  ctx.translate(x+11,y+10)
  
  if (dir%2==1) {
    // diagonal
    if(dir==1 || dir==7)
    ctx.setTransform(3.8, (dir == 1 || dir == 5 ? -1 : 1) * tanAngle, 0, 4, 400-x*4+22*4+11*4, 300+y*4+10*4)
    else
      ctx.setTransform(3.8, (dir == 5 ? -1 : 1) * tanAngle, 0, 4, 400+x*4+11*4, 300+y*4+10*4)
  }

  ctx.drawImage(image, col * 22, row * 20, 22, 20, -11, -10, 22, 20)
  ctx.restore()

}

Another thing to note is that I was unable to use off-screen canvas pre-rendering because It kept aliasing the image, event through I told it not to (a big problem for a pixel-art game):
ctx.webkitImageSmoothingEnabled = false
ctx.mozImageSmoothingEnabled = false

In order to get some real-time action going, I decided to use Socket.io (as it is allowed by the rules without counting against the file-size). Socket.io is a Websockets compatibility library which uses backup transports for data if websockets is not available (Socket.io is absolutely amazing!). Now, notice that the player has a lot of attributes associated with them: name, x, y, health, kills, weapon, direction, animation frame, isAttacking, and the keys that they are pressing (remember, everything is computed server-side). Every tick of the physics engine, we have to update all the users positions and send the data out to all the other players. This adds up to a lot of data being sent, and exponentially increases per-player in the arena.

In order to be efficient with how much data we send per player, I decided to only send a `diff`, or only what has changed in game state since the last update. I shrunk all variable names to 1 letter, and devised a data structure that would efficiently provide a full diff. Here is what I came up with (small snippet):

// This diff will be sent and applied by the client to sync their arena
// diff[0-2] = players
// diff[0] = new players (append to end)
// diff[1] = del players indicies (splice, starting in reverse order)
// diff[2] = player updates (i:index, updated attrs)
// diff[3-5] = bullets
// diff[6-8] = items
var diff = physics(++frame)

// don't send if empty
if (!diff.reduce(function (total, x) {
  return total + x.length
}, 0)) return

// clear out empty trailing arrays
var found = false
var i = diff.length - 1
while (diff[i] && diff[i].length == 0) {
  diff.splice(i, 1)
}

This added a lot of serialization/deserialization overhead, however it was worth it because it drastically reduced data size. After setting up a diff-based structure, I decided to look into more ways of data compression. This website was quite helpful: buildnewgames.com/optimizing-websockets-bandwidth/. Additionally, I found this tool which looked quite promising: msgpack. Basically it defines a way to represent JSON as binary data in a highly optimized way. Sadly, I was unable to use it, not because of it's filesize, but for lack of binary data support in Socket.io - #511. Socket.io isn't perfect, but I was disappointed in that it didn't support some of the really useful data compression options available to raw websockets - #1148, #680.

In the end, I went with the diff strategy, which will hopefully be enough (haven't tested at large scale).

The last significant part of this game is the audio. Now, let me preface by saying that I made the audio myself, with no help, and zero prior experience. That being said, I think the audio actually turned out pretty good. Not great, but pretty good. Also, the audio data size (with decoder) ended up being ~1.3KB, which is outstanding considering that even the most trivial music goes into the hundreds of KB.

With only 13KB to work with, I looked at perhaps using someone else's music and just bitcrushing it. However, it quickly became apparent that I wasn't going to get enough length and quality out. So I decided to look at what others had done, and found this amazing resource: Chime Docs (Chime Hero). I also found this great tutorial on `chipping` techniques (for creating Chiptunes - classic 8-bit music). Based on this information, I decided to make my own chiptunes editor: senshi.zolmeister.com/audio.html

The editor is basic, and quite limited in what you can do, but it gets the job done. The key though, is that it is able to output algorithmically compressed audio, which leads to a 1 minute song at <1.5Kb.
In order to create the editor I followed the Chime Hero docs carefully, and from it figured out how to generate all of the other types of sound waves (this fiddle was also helpful: jsfiddle.net/CxPFw/1):

var samples = Math.floor(11025 / 2)
var bytes = []
for (var s = samples; s--;) {
  var byte;
  if (note.wave === 'square') {
    /* Square wave */
    byte = (Math.sin(s / 44100 * 1 * Math.PI * note.freq) > 0 ? 1 : -1)
  } else if (note.wave === 'sine') {
    /* sine wave */
    byte = Math.sin(s / 44100 * 2 * Math.PI * note.freq)
  } else if (note.wave === 'saw') {
    /* sawtooth wave */
    byte = sawtooth(s / 44100 * note.freq)
  } else if (note.wave === 'ramp') {
    /* ramp wave */
    byte = Math.abs(s % (note.freq) - note.freq) / note.freq
  }
   bytes.push(byte)
}

bytes = bytes.map(function (byte, s) {
  s = samples - s
  // normalize bytes
  return byte * 127 + 128
}).reduce(function (str, byte) {
  // encode the bytes
  return str + String.fromCharCode(byte);
}, '')

var player = new Audio('data:audio/wav;base64,UklGRjUrAABXQVZFZm10IBAAAAA\
   BAAEARKwAAESsAAABAAgAZGF0YREr' + btoa('\9\0' + bytes))
player.play()

function sawtooth(x) {
  var pi = Math.PI
  var tn = Math.ceil((x + pi) / (2 * pi));
  var y = ((x - tn * 2 * pi) + 2 * pi) / pi;
  return y
}

With this code, I am able to simply export an array of [freq,wave] date from the editor, and then convert that into music (highly efficient). Also for those astute musicians, I decided to use a D Minor Pentatonic scale for the note range, using this scale hertz chart as reference.

Now, if you hit the 'export' button in the editor, you may note that the output string in the console is actually ~12KB. This is because while the data is highly optimised, it is not yet compressed. For that, we go to JSCrush which compresses javascript by turning it into a string, and then compressing that string via pointers to heavily used sequences within the string. It does a fantastic job of compressing the output to a manageable size.

Now, after loading that code into the game, I realized that the compile time (to generate the wave from frequency data) was quite long and blocked the UI, so I decided to offload it to an embedded Web Worker (The 'export' globalizes an 'a_audio' object which is the un-base64 encoded data string seen in the above code as 'bytes'):
<script id='audioworker' type='text/js-worker'>
_='  keW  t(eWvar t=<PI;var n=<ceil((e+t)/(2*t));var r=(e-n*2*t+2*t)/t; r}`=<floor(11025/2); s=e!nWj=nNeW„=[];e[1];&=e[0]; =0;Bif(==0†1Œ>0?1:-1$=1†2Œ$2W =tO&)$3W =<abs(Fs%&-&)/&}„.push( )} „})!tW tNt,nW e[n]?[t].concat(e[n]):[t]})},[])NeW e!tW e+t},0)/e‹})Ne,tWt=`-t; e*127+128})!tW e+Gt)},"");if(j‹===0WBj+=G128)}} e+j},"");Faudio="9\\0"+ s}Fr=[[  |K  |J  |D  |J  |K  |  1XXXX  KZ           Z[ 1  L   RK D  RJ  RK  Žz,R  R   LH          Y     T T T   Š             Q‚‚ ƒƒƒƒ  [ @ T @ T @   @ Q   Y   …  …      ˆ  @ T @ T @  LLKZ    J1  D1   JZKZ   1  DZ    JZDZH   Q‚ LL [z   @ T @   @^,ˆTL‡ ‡]];kFr)   2  R JZDZ  ,@ 3 z,R ],[ ~, U3, V3, [^, [z, 174.61, J1 D1 [^ ‰#‰3€ @440€ @V# @U3 [ @^  0  1  1  DZ T[ 392, KZJZ  z,Ž RJ  RD  R  R function Fbyte 440, return   [ ]        T T T       [   1 [  ^,   [z [^ [U3 [~ [V3  !.reduce( (e,#3  @~ $}else if(=&Ffreq<Math.@0 Bfor(Fs=`;Fs--;WD[   Fa_GString.fromCharCode(H[      …ŠJ   K   L    N.map( (O(Fs/44100*Q      ‚R3 T  U261.6V349.2W){X      Y                Z1 ^220`FsamplesjFtonekplayExported(z196|1  ~293.66Fwave=€ [ @392 [[   ‚    ƒ    „ sArr…     †W =<sinO‡       ZˆT @ T @ ‰ @U#[ @VŠ        ‹.lengthŒ*<PI*&)[     RŽR ^,RK        ';for(Y in $='ŽŒ‹Š‰ˆ‡†…„ƒ‚€~|zkj`^ZYXWVUTRQONLKJHGFDB@<&$#!                             ')with(_.split($[Y]))_=join(pop());eval(_)

postMessage({'setAudio': a_audio})
</script>

And the loading code:
var blob = new Blob([$('#audioworker').textContent], {type: "text/javascript"});
worker = new Worker(window.URL.createObjectURL(blob))
worker.onmessage = function (e) {
  var val = e.data.setAudio
  player = new Audio('data:audio/wav;base64,UklGRjUrAABXQVZFZm10IBAAAAABAAEARKwAAESsAAABAAgAZGF0YREr' + btoa(val))
  player.play()
}

($ is not jQuery, instead it uses the built-in selector: `$ = document.querySelector.bind(document)`)

It's worth noting that there is still some lag due to the creation of the audio element, which you can't offload to the Web Worker because it doesn't have access to the `Audio()` object, or the `btoa` function for that matter (#55663).