Thursday, January 16, 2014

N Queens Problem - Backtracking


The N Queens problem is a simple yet effective way of assessing a developer's ability to use recursion. For that reason, it may show up during technical interviews, so I wrote a quick little example using the chessboard.js library for visualization.

Link: http://queens.zolmeister.com/
Source: https://github.com/Zolmeister/queens

Here is a simple solution in JavaScript:
function solve(n) {
  var ans = []
  solver([])
  return ans
  function solver(current) {
    if (current.length === n)
      ans.push(current)
    else
      for (var i=0; i < n; i++) {
        for (var j=0, l=current.length; j < l; j++) {
          var prev = current[j]
          if (prev === i)
            break
          if (prev-(l-j) === i)
            break
          if (prev+(l-j) === i)
            break
        }
        if (j === l)
          solver(current.concat([i]))
      }
  }
}


My solution uses a technique called backtracking, which is basically depth-first search without an end condition. Note that I do not recommend the pattern above with a 'return' above a function, but it provides an interesting exercise for those who have never seen it before to understand JavaScript hoisting.

The algorithm moves left to right, placing a queen in the next available column. The key to the above code is the inner loop. This is what checks to see if a move is legal, such that no other queen on the board conflicts with the one to be placed. After that, it is simple recursion, with a condition that if the board is full then add it to the solution set.

Monday, January 13, 2014

Promiz Micro - Promises in 228 bytes (min+gzip)


Promiz.js (original post) is a (now) completely Promises/A+ spec compliant library that fits in 590 bytes (min+gzip). In addition, the new Promiz Micro comes in at 228 bytes (min+gzip) and provides an amazingly clean API.
Promiz Micro:
!function(){function a(b,c){function d(a,b,c,d){if("object"==typeof h&&"function"==typeof a)try{var e=0;a.call(h,function(a){e++||(h=a,b())},function(a){e++||(h=a,c())})}catch(f){h=f,c()}else d()}function e(){var a;try{a=h&&h.then}catch(i){return h=i,g=2,e()}d(a,function(){g=1,e()},function(){g=2,e()},function(){try{1==g&&"function"==typeof b?h=b(h):2==g&&"function"==typeof c&&(h=c(h),g=1)}catch(e){return h=e,j()}h==f?(h=TypeError(),j()):d(a,function(){j(3)},j,function(){j(1==g&&3)})})}var f=this,g=0,h=0,i=[];f.promise=f,f.resolve=function(a){return g||(h=a,g=1,setTimeout(e)),this},f.reject=function(a){return g||(h=a,g=2,setTimeout(e)),this},f.then=function(b,c){var d=new a(b,c);return 3==g?d.resolve(h):4==g?d.reject(h):i.push(d),d};var j=function(a){g=a||4,i.map(function(a){3==g&&a.resolve(h)||a.reject(h)})}}"undefined"!=typeof module?module.exports=a:this.Promiz=a}();

Recently I came across Promiscuous, a tiny spec compliant library which was written about in this blog post. I commented that Promiz was nearly as small and provided more features, however as Ruben pointed out, Promiz was not completely spec compliant. In fact, it had some major issues with regard to one particular use case where it failed completely. Here is an example of what would not have worked in the previous version of Promiz.js:
var promise = Promiz.defer()
promise.resolve(42)

promise.then(function(fortyTwo) {
  console.assert(fortyTwo === 42)
  return 43
})

promise.then(function(fortyTwo) {

  // this fails, as it becomes 43
  console.assert(fortyTwo === 42)
})

Thanks to Ruben for pointing out my mistake, I then decided to make Promiz fully compliant. However I had a big issue, which was that the entire model of Promiz was based on stack based execution which would have been a nightmare to alter to be able to support the above feature. So instead I re-wrote the whole thing.

Basic Implementation

In the process or re-writing the library, I started out by creating a minimal spec compliant library which would pass all of the promise spec tests. This is what became Promiz Micro, and I'll go over some of the concepts behind it's implementation.

Promise State

If you notice the above code (and read the spec), it specifies that once a promise has been resolved or rejected, it's state must not change. This meant that I decided to chain objects together, similar to a Tree/Linked List, by tracking pointers to each promise in the chain. Because of this, we need variables to track state:
var self = this

// .promise is required by the testing library, but not spec
self.promise = self

// once set, state is immutable
self.state = 'pending'
self.val = null

// success and error functions
self.fn = fn || null
self.er = er || null

// array of pointers to chained promises
self.next = [];

Resolve and Then

The implementation of the Resolve and Then functions is similar to the original implementation, except with Then it returns a new promise instead of itself:
self.resolve = function (v) {
  if (self.state === 'pending') {
    self.val = v
    self.state = 'resolving'
    setImmediate(function () {
      self.fire()
    })
  }
  return this
}

self.then = function (fn, er) {
  var self = this
  var p = new promise(fn, er)
  
  if (self.state === 'resolved') {
    p.resolve(self.val)
  } else if (self.state === 'rejected') {
    p.reject(self.val)
  } else {
    self.next.push(p)
  }
  return p
}

2.3.3.1 - Let then be x.then

One of the more frustrating parts of the spec is the requirement that the x.then function on a thenable (promise) is only accessed once. This means that when we check to see if an object has '.then', we have to save that value to a variable if we want to call it later. Not only that, when we try accessing that value, it may throw an exception (2.3.3.3.4).
self.fire = function () {
  var self = this
  // check if it's a thenable
  var ref;
  try {
    ref = self.val && self.val.then
  } catch (e) {
    self.val = e
    self.state = 'rejecting'
    return self.fire()
  }
  ...

Resolve input promises, then apply functions, then resolve output promises

Part of the way I implemented the .resolve function meant that an input value (the current self.val) could potentially be a promise (this is part of the spec), so we have to resolve that promise before we do anything else. I created a helper function for this step, because we will want to re-use this code again for the last step of resolving the output value. We also have to protect the functions passed in because they are 'abused' in the testing code (not part of spec).
// ref : reference to 'then' function
// cb, ec, cn : successCallback, failureCallback, notThennableCallback
self.thennable = function (ref, cb, ec, cn, val) {
  val = val || self.val
  if (typeof val === 'object' && typeof ref === 'function') {
    try {
      // cnt protects against abuse calls from spec checker
      var cnt = 0
      ref.call(val, function(v) {
        if (cnt++ !== 0) return
        cb(v)
      }, function (v) {
        if (cnt++ !== 0) return
        ec(v)
      })
    } catch (e) {
      ec(e)
    }
  } else {
    cn(val)
  }
}

Apply functions

This step is fairly straight forward. We need to apply the given functions to our current value, and watch out for errors.
if (self.state === 'resolving' && typeof self.fn === 'function') {
  try {
    self.val = self.fn.call(undefined, self.val)
  } catch (e) {
    self.val = e
    return self.finish('rejected')
  }
}

if (self.state === 'rejecting' && typeof self.er === 'function') {
  try {
    self.val = self.er.call(undefined, self.val)
    self.state = 'resolving'
  } catch (e) {
    self.val = e
    return self.finish('rejected')
  }
}

2.3.1 - TypeError

Part of the spec specifies that we should avoid direct circular loops, where we return our own promise as a return value from a function. If someone tries to do this, we need to throw a TypeError exception:
if (self.val === self) {
  self.val = TypeError()
  return self.finish('rejected')
}

Finish

Finally, we finish up our call by finalizing our state and calling the next promise in the chain:
self.finish = function (type) {
  self.state = type || 'rejected'
  self.next.map(function (p) {
    self.state == 'resolved' && p.resolve(self.val) || p.reject(self.val)
  })
}

Performance

This re-write, being spec compliant, no longer resolves synchronously. This means it takes a huge performance hit, but not more that other Promises/A+ compliant libraries already have to deal with. That being said, if you're after a fast (but heavy) Promises/A+ implementation, I recommend checking out bluebird.

Tuesday, January 7, 2014

Zoggle - Rewritten Using AngularJS


Zoggle, the ultimate word game!
Play Zoggle (source) FREE on:


A Long Time Ago...

Zoggle was my very first app on Google Play, and also happened to be the topic of my first blog post over a year ago: http://www.zolmeister.com/2012/04/zoggle.html. I finally got around to giving it a proper upgrade by rebuilding from the ground up. Zoggle is now better than ever, with a new theme, less bugs, and an illustriously impeccable code-base.

Round 2

Originally Zoggle was built using many javascript and css hacks (not maintainable) and depended zero external libraries (not even jQuery). As a result, it quickly became messy spaghetti code, making even simple changes take hours to implement and test.

Now, after 6 days and 74 commits (and many hours of lost sleep), I finished re-writing Zoggle using AngularJS, jQuery, Lo-Dash, and Grunt to create a highly maintainable and scalable application. So, without further ado, let's go over some of the key aspects of the re-write.


Boggle Library

While searching NPM for a boggle library (before writing my own), I came across Boggle which leverages tries (mentioned in my original blog post) for optimal performance. However the library had some issues (no 'Qu' single tile support), and a poor dictionary list. I contacted the developer bahmutov, got the code moved to GitHub, and added the features. (He was also awesome enough to let me push to npm and the core repo, so you may want to check out his blog).

AngularJS

What can I say, except that AngularJS is absolutely amazing! It has a few bugs (you've been warned), but it is incredible to work with and makes webdev even more fun and exciting than before. If you're new to Angular, I recommend 25 days of AngularJS, and checking out the Angular-Seed project. I won't be writing a tutorial, but some things to watch out for.

AngularJS Gotchas

  • Data-binding on primitives (string, num, bool) doesn't always work properly. Update: updating primitives from views doesn't work as expected (more info).
    • Either nest data inside an object {} or call $scope.$apply()
  • Directives can be called before the DOM is ready
    • If you have a directive which depends on an ng-repeat to be completed, you need to add custom events. I used $rootScope.$emit and $rootScope.$on
    • Sometimes if you need the DOM to load you can run:
      • $timeout(function() { $timeout(theDomisReadyFn, 0) }, 0) 
      • or alternatively use $scope.$watch(function() {  })
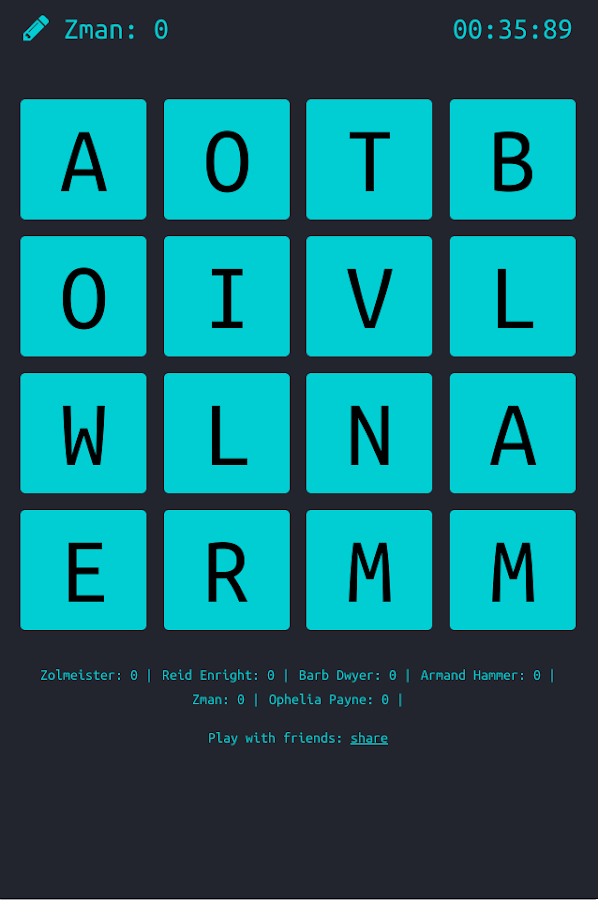
Boggle Board

I could have rendered the board using either the DOM or Canvas (or WebGL) but I opted for using the DOM. One issue I ran across when writing the original Zoggle was that touch-move events do not cross over elements. This meat that I had to use the document.elementFromPoint() function in the original Zoggle. Unfortunately, it does not perform well on mobile, so this time around I decided to overlay a div over the whole board and calculate the position of the mouse over the elements manually. Unlike the non-performant code in the stackoverflow answer, I cached the position of the elements so that detection would be much faster.
var positions = [];

function cachePos() {
  var targets = $el.parent().find('.' + attrs.targets)
  positions = []
  targets.each(function (i, $el) {
    $el = $($el)
    positions.push({
      x: $el.offset().left,
      y: $el.offset().top,
      w: $el.outerWidth(),
      h: $el.outerHeight()
    })
  })
}

function collide(x1, y1, w1, h1, x2, y2, w2, h2) {
  if (y1 + h1 < y2 || y1 > y2 + h2 || x1 + w1 < x2 || x1 > x2 + w2) return false;
  return true
}

Letter Interpolation

The boggle board is represented internally as a single list (of 16 characters) because it made rendering easy. The logical thing (which I didn't do) would be to clone the data (as it's static per-game) and represent it as a 2D array. Anyways, one great feature I added to Zoggle was the ability to interpolate between two tiles. This means if you touch one tile (mobile device) and move too quickly and end up 2 tiles over, the algorithm will add the missing tile(s). The algorithm is pretty simple (see bonus for explanation of touching function):

function touching(x1, y1, x2, y2) {
  return _.some(_.filter(_.flatten(_.map(_.range(-1,2),_.compose(_.partial(_.zip,_.range(-1,2)),_.partial(_.compose(_.partial(_.map,_.range(3)),_.partial),_.identity))),!0),_.compose(_.first,_.compact)), function(dir) {
    return x1+dir[0] === x2 && y1+dir[0] === y2
  })
}

while (!touching(x1, y1, x2, y2)) {
  // interpolate position
  if(x1 < x2) x1++
  if(x1 > x2) x1--
  if(y1 < y2) y1++
  if(y1 > y2) y1--
  // add new y1 x1 to selected
}

Real-Time Word Highlighting

Another amazing new feature I added was highlighting as you type. The code for this is a simple depth-first search, except that instead of searching it adds every valid visited node as selected.

function depthFirstSearch(grid, word, pos, index, past) {
  index = index || 0
  past = past || []
  if (!word[index]) return past
  var currentLetter = grid[pos]
  // visiting a previous node or out of bounds
  if (pos < 0 || pos > grid.length ||
    _.contains(past, pos) ||
    word[index] !== currentLetter)
    return []

  // cardinal directions (N,S,E,W) + diagonals (NW, NE, SW, SE) in 1D
  var dirs = _.filter([-5, -4, -3, -1, 1, 3, 4, 5], function (dir) {
    var col = pos % 4
    if (col === 0 && _.contains([-1, 3, -5], dir)
      return false
    if (col === 3 && _.contains([-3, 1, 5], dir)
      return false
    return true
  })

  // recurse
  return _.map(dirs, function (dir) {
    return depthFirstSearch(grid, word, pos + dir, index + 1, past.concat(pos))
  })
}

Minification and Concatenation

For any production application, minifying and concatenating JS source is essential for an optimal user experience. To automate the process, I used Grunt which is an amazingly powerful tool for running a multitude of tasks.
module.exports = function(grunt) {

  grunt.initConfig({
    concat: {
      lib: {
        // order matters because jQuery needs to come before angular
        src: ['public/lib/*.js', 'public/lib/angular/**/*.js'],
        dest: 'public/dist/lib.js'
      },
      zoggle: {
        src: ['public/js/**/*.js'],
        dest: 'public/dist/zoggle.js'
      }
    },
    ngmin: {
      zoggle: {
        src: ['<%= concat.zoggle.dest %>'],
        dest: 'public/dist/zoggle.ngmin.js'
      }
    },
    uglify: {
      lib: {
        options: {
          sourceMap: 'public/dist/lib.js.map',
          sourceMappingURL: 'dist/lib.js.map',
          sourceMapPrefix: 1
        },
        files: {
          'public/dist/lib.min.js': ['<%= concat.lib.dest %>']
        }
      },
      zoggle: {
        options: {
          sourceMap: 'public/dist/zoggle.js.map',
          sourceMappingURL: 'dist/zoggle.js.map',
          sourceMapPrefix: 1
        },
        files: {
          'public/dist/zoggle.min.js': ['<%= ngmin.zoggle.dest %>']
        }
      }
    }
  });

  
  grunt.loadNpmTasks('grunt-contrib-uglify');
  grunt.loadNpmTasks('grunt-contrib-concat');
  grunt.loadNpmTasks('grunt-ngmin');

  grunt.registerTask('default', ['concat', 'ngmin', 'uglify']);

};

And set this in package.json to use grunt on Heroku:
"scripts": {
  "postinstall": "echo postinstall time; ./node_modules/grunt-cli/bin/grunt"
}

A few things to note though. AngularJS injection relies on the variable names in functions. These change during compression, which is why it is necessary to use ngmin to prepare AngularJS code for compression. Additionally, the Angular-Seed project adds unnecessary files under /lib which must be deleted. Minified code (.min.js) (and source maps) should never be committed to source (add them to .gitignore), and should always be generated at compile time (by Grunt). Oh, and AngularJS is picky about what order you need to include jQuery (before Angular), or you may get unexpected errors.

Android application

Originally the mobile application was simply a web-view which pointed to the website, but I wanted to add a message in case there was no internet access. I figured that using Cordova (PhoneGap) would make it simple. I was wrong, but in the future I will be able to do it in mere minutes. Read my previous post on how to take a webapp and turn it into a native android mobile application in 5 minutes. http://www.zolmeister.com/2014/01/how-to-turn-webapp-into-native-android.html

Bonus

Recall the touching function from above:
function touching(x1, y1, x2, y2) {
  return _.some(_.filter(_.flatten(_.map(_.range(-1,2),_.compose(_.partial(_.zip,_.range(-1,2)),_.partial(_.compose(_.partial(_.map,_.range(3)),_.partial),_.identity))),!0),_.compose(_.first,_.compact)), function(dir) {
    return x1+dir[0] === x2 && y1+dir[0] === y2
  })
}

For fun, I decided to write a functional-only (using only LoDash functions) generator for the 8 cardinal directions (2D) - N, S, E, W, NW, NE, SW, SE. That list ([[0,1],[0,-1],[1,0],[-1,0],[-1,1]...]) is what populates 'dir' in the function call. Let's see how I composed it:
// Here is the original
var dirs = _.filter(_.flatten(_.map(_.range(-1,2),_.compose(_.partial(_.zip,_.range(-1,2)),_.partial(_.compose(_.partial(_.map,_.range(3)),_.partial),_.identity))),!0),_.compose(_.first,_.compact))

// Now let's decompose it

// [-1, 0, 1]
var oneDimention = _.range(-1,2)

// this first one is probably the most difficult to understand
// n -> [n, n, n]
var repeat3 = _.partial(_.compose(_.partial(_.map, oneDimention),_.partial),_.identity)

// n -> [[n, -1], [n, 0], [n, 1]]
var addToEachDimention = _.compose(_.partial(_.zip, oneDimention), repeat3)

// create a 3d matrix by joining 3x1 * 1x3 matrix
// [ [[-1, -1], [-1, 0], [-1, 1]], [[0, -1], [0, 0], [0, 1]], [[1, -1], [1, 0], [1, 1]] ]
var created3D = _.map(oneDimention, addToEachDimention)

// flatten
// [ [-1, -1], [-1, 0], [-1, 1], [0, -1], [0, 0], [0, 1], [1, -1], [1, 0], [1, 1] ]
var created2D = _.flatten(created3D, !0)

// removes [0, 0] from list
//[ [-1, -1], [-1, 0], [-1, 1], [0, -1], [0, 1], [1, -1], [1, 0], [1, 1] ]
var removedCenter = _.filter(created2D, _.compose(_.first,_.compact))

Saturday, January 4, 2014

How to turn a WebApp into a native Android application in 5 minutes


While re-writing my game Zoggle (Blog post coming soon) I decided to use Cordova (PhoneGap) to create a new mobile application for the game.
So without further ado, here is how to turn a website into a native mobile Android application in less than 5 minutes.


Step 0 - Prerequisite: Installing Cordova CLI, and the Android SDK tools

To install the Cordova CLI, you first need to install Node.js version 0.10+.
It is imperative that the version is 0.10+ or you will be unhappy.
http://nodejs.org/

Next run this command to install the Cordova CLI
sudo npm install -g cordova

Alright, now let's install the Android SDK tools
http://developer.android.com/sdk/installing/index.html

Step 1 - Hello World application

# go into your project
cd myapp
# create a mobileapp folder for your app
cordova create mobileapp com.whatever.appname AppName
cd mobileapp
# compile the app
cordova build
# now, plug in your testing device, and let's run our test app on it
cordova run android
# if you don't have a device handy you can use an emulator (much slower)
## cordova emulate android

# install plugins for alerts and network information
# used to alert the user if they are not connected to the internet
cordova plugin add https://git-wip-us.apache.org/repos/asf/cordova-plugin-dialogs.git
cordova plugin add https://git-wip-us.apache.org/repos/asf/cordova-plugin-network-information.git

Step 2 - Portrait mode only

Now let's edit our android manifest to force the app to stay in portrait mode, edit:
platforms/android/AndroidManifest.xml

and add this config to it:
android:screenOrientation="portrait"

Step 3 - Content

Finally we get to adding our website. Edit your index.html to look similar to mine:
www/index.html

<!doctype html>
<html lang="en">
<head>

  <title>Zoggle</title>
  <script type="text/javascript" charset="utf-8" src="cordova.js"></script>
  <script>
  document.addEventListener("deviceready", onDeviceReady, false);
  function onDeviceReady() {
    //navigator.splashscreen.hide();
    if (navigator.network.connection.type == Connection.NONE) {
      networkError()
    } else {
      loadApp()
    }
  }

  function loadApp() {
    window.location="http://zoggle.zolmeister.com";
  }

  function networkError() {
    navigator.notification.alert('Zoggle requires an internet connection')
    var $net = document.createElement('div')
    $net.innerHTML = 'Zoggle requires an internet connection'
    document.body.appendChild($net)
  }
  </script>

  <style>
  body {
    padding: 15px;
    background: #23252e;
    color: #01ced3;
    text-align: center;
  }
  div {
    font-size: 20px;
  }
  </style>
</head>
<body>
</body>
</html>

Done! (well, almost)
Go ahead and test your app using the run command:
cordova run android

Step 3 - Icons

Lastly we need to add icons for our application.
You will find all icons here:
platforms/android/res
Just replace them with your icon (of the correct size).
And that's it. Now lets look into compiling for release on the app store.

Step 4 - Publishing!

First, we need to remove debug mode (and in my case update the app version).
Open up the Android Manifest
platforms/android/AndroidManifest.xml
and change the line from
android:debuggable="true"
to
android:debuggable="false"

Now we can generate a release version of the APK
cordova build --release

Your APK file should be located here:
platforms/android/bin/MyApp-release-unsigned.apk
To submit it to the app store, we need to sign it (cryptographically). This page details how to do that: http://developer.android.com/tools/publishing/app-signing.html
but the short version is this:
(Note, these commands reference tools which come with the android  SDK)

# generate a keystore
keytool -genkey -v -keystore my-release-key.keystore -alias alias_name -keyalg RSA -keysize 2048 -validity 10000
# sign the apk
jarsigner -verbose -sigalg SHA1withRSA -digestalg SHA1 -keystore my-release-key.keystore MyApp-release-unsigned.apk alias_name
# zip-align the apk
zipalign -v 4 MyApp-release-unsigned.apk MyApp.apk

And that's it! You can now upload that APK to Google play and publish your application.

Bonus - Splash Screen

I created a splash screen for Zoggle, but the game loaded so quickly that it became unnecessary. However it was a bit tricky, so I'll go ahead and explain the process.

First install the cordova plugin
cordova plugin add https://git-wip-us.apache.org/repos/asf/cordova-plugin-splashscreen.git

Then edit your main activity Java file. Mine was here:
platforms/android/src/com/zolmeister/zoggle/Zoggle.java

And add this line:
super.setIntegerProperty("splashscreen", R.drawable.splash);

Then, in the app code above (www/index.html), uncomment the following line:
navigator.splashscreen.hide();

which will hide the splashscreen once the app loads.

Creating a splash screen image

Splash screen images are not regular images, instead they are 9-patch images. This allows them to stretch to meet different screen sizes.
Here is a great video introduction to how they work:
http://www.youtube.com/watch?v=MQRA9nwxU7g
The Android SDK tools come with a tool called draw9patch, which you can read about here:
http://developer.android.com/tools/help/draw9patch.html
It's not the easiest to use, but it works. Simply run it, open your image, and zoom in on an edge of your image. The 1 pixel transparent border on your image will be the guide which lets the device know how to stretch the image.
Here is mine:
The black lines mean the the content there WILL BE STRETCHED (so long to figure this out...). This means if you don't want your logo to be distorted, draw the sections around the outside of your logo.
Lastly, make sure your image ends in '.9.png' to let the device know that it is a 9-patch image. Then simply put it inside the folder next to your icon:
platforms/android/res/drawable/splash.9.png

Done!
Now go check out Zoggle!

Tuesday, December 17, 2013

Nent

Nent (Source)

Nent is a asteroids-esque game, with upgrades and meta-ball fluid effects. It is also my submission to Ludum Dare 28, a 48hr game jam competition for which the theme was 'You only get one'. This is my first time participating in #LD48, and it has been quite the experience. To get a sense of how it felt, here is my GitHub punch-card showing my commits over the 48 hour period:
The most difficult part of creating the game was not coding, but actually coming up with a decent idea in the first place. The theme ('You only get one') is pretty vague and open to interpretation, and there were many ways to go about it (which makes coming up with an idea that much harder). In the end, after thinking about it for over 2 hours, I finally decided to just make something that looked decent and worry about mechanics and theme later.

Before I get into some of the interesting technical bits, I want to go over the tools that I used for creating this game. Instead of my normal web IDE, I opted to use LightTable which greatly increased coding productivity through its JavaScript injection magic. For image editing (the power-ups) I used GIMP which is my main tool for any sort of image manipulation/creation. And lastly I used LMMS (Linux MultiMedia Studio), a free music composition tool, to create the music for the game. This was my first real attempt at creating digital music and I found it both enlightening and horribly difficult. For anyone looking to try out LMMS I recommend this video tutorial to get started.

Now I'm going to go ahead and dive right into the most interesting aspect of the game, the liquid effects between object collision. This is done using the same technique as for metaballs. Metaballs (demo) work by combining gradients and then sampling the result. For example, here is what the game looks like before processing:
Ignoring the background color for a second, the gradients are created by changing the alpha values (opacity) of the color as they spread out. This is done using HTML5 canvas gradients:
var grad = ctx.createRadialGradient(x, y, 1, x, y, size)
grad.addColorStop(0, color.alpha(0).rgbaString())
grad.addColorStop(.4, color.alpha(1).rgbaString())
grad.addColorStop(1, color.alpha(0).rgbaString())
canvasContext.fillStyle = grad

Now, we iterate over every pixel and determine if the alpha value for that pixel is above a 'threshold'. Remember that when we have overlapping gradients, their alpha values will sum. This gives the following effect:
However, what we soon notice is that the CPU is getting pegged at 100% (1 core). This is because as our canvas gets larger, our iteration is taking exponentially longer. Here is the original code (used in the demo):
var imageData = ctx.getImageData(0,0,width,height),
        pix = imageData.data;
    
for (var i = 0, n = pix.length; i <n; i += 4) {
  if(pix[i+3]<threshold){
    pix[i+3]/=6;
    if(pix[i+3]>threshold/4){
      pix[i+3]=0;
    }
  }
}
ctx.putImageData(imageData, 0, 0);

As pix.length increases, it takes much longer to go through the loop. This eventually reaches the point where we will not get this computation in under 16ms (required to get 60FPS). Luckily, I came up with a solution. If you remember my slideshow project, where I animated 1.75 million particles in real-time, I was able to leverage the GPU shaders to greatly improve rendering performance. I am going to do the same here, using a library called Glsl.js (https://github.com/gre/glsl.js). This library greatly simplifies the process of using GLSL (opengl shading language) shaders, and applying them to the canvas that I am already using (no need to re-write code in WebGL).

GAME.glsl = Glsl({
  canvas: GAME.outCanv,
  fragment: $('#fragment').text(),
  variables: {
    canv: GAME.canv
  },
  update: function(time, delta) {
    animate(time)
    this.sync('canv')
  }
})

And now the shader code, which replaces the 'for' loop over the pixels:
<script id="fragment" type="x-shader/x-fragment">
    precision mediump float;
    uniform vec2 resolution;
    uniform sampler2D canv;

    void main (void) {
      vec2 p = gl_FragCoord.xy / resolution.xy;
      vec4 col = texture2D(canv, p);
      if(col.a < 0.85) {
          col.a /= 4.0;
          if(col.a > threshold/4.0) {
            col.a = 0.0;
          }
      }
      gl_FragColor = col;

    }
</script>

Now let's see what it looks like:
Oh no, that doesn't look right. Something odd is going on here. I'll go ahead and skip my adventure into blender land, and get right into the solution. The canvas, by default, uses composite blending. This means that it will absorb any colors underneath the canvas as part of the final canvas colors. Our web page has a background, with alpha 1.0, which causes every pixel to register in our metaball filter. To avoid this, we must modify the Glsl.js library, and add the following piece of code to change the default blending behavior (line 602, in the load() function):
gl.blendFunc(gl.SRC_ALPHA, gl.ONE_MINUS_SRC_ALPHA);
gl.enable(gl.BLEND);

And that's it! Now our game will render properly.
In addition to utilizing shaders, this game also uses fixed-interval time-step physics, which you can read more about in my post on The Pond.

Looking to optimize the game more (for mobile devices for example), there is still a pretty large bottleneck regarding the canvas-to-webgl texture conversion each frame.
This could be solved by moving the entire game drawing process to the GPU shaders, and forgoing the canvas all together. However the task is non-trivial, and I did not have enough time during the 48hrs to be able to attempt it.

Participating in Ludum Dare was awesome, and I look forward to doing it again soon.